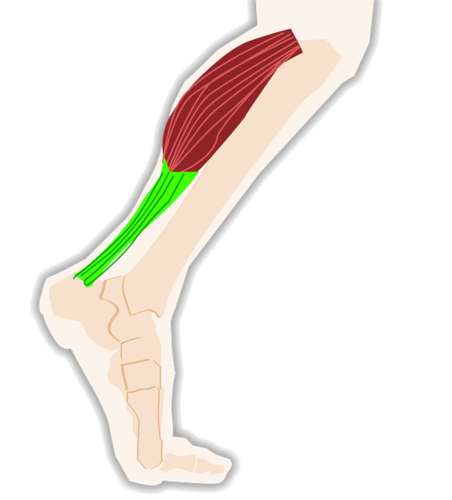
The calves are a muscle that get a lot of repetitive use — and are often a source of injury or restriction for many of us. Keeping them in good working order takes commitment, but doing so will also keep you pain free and in great condition for your training or everyday movement.
Since the lower legs are a part of the body we use often, we want to make sure we’re balancing that high use with consistent self-care that will offset the cumulative repetitions we’re putting our legs through.
To that end, I’ve put together a program you can follow to care for those calves.
How to Heal Calf Pain, Injury, and Tightness
 There are a good number of mobility exercises that cover the feet, ankles, and calves. In this article, I’m going to lay out a five-day mobility routine that you can use to repair your lower legs and heal calf pain. Whether it be addressing shin splints, plantar fasciitis, tight ankles, and/or tight calves, there is something in this program for everyone.
If you train regularly and have tight calves and ankles or if you have a chronic injury that keeps your legs from functioning at optimal levels, this routine will help to loosen your muscles and connective tissue. With regular application, you can improve your range of motion, blood flow, nerve function, and strength in your lower legs.
Day 1:
Duration: 8:00
Equipment: Foam Roller
For day one, we start off hitting the big stuff. This means we’re going to take a prolonged look at our calves. The calves are the largest muscle in the lower leg and the logical place to start when beginning work on this area.
In subsequent videos, we’ll explore the less well known and harder to locate places in our legs, but for now we’ll start with the most obvious. In this video, I cover the basics of foam rolling in this area and help you navigate where your focus should be.
Day 2:
Duration 8:00
Equipment: Foam Roller
In day two, we build on what we learned yesterday. After going over a shorter version of yesterday’s routine, you’ll add in a self-massage technique for the soleus muscle.
This muscle is small, and most people have no idea it’s hidden behind their larger calf muscle. Most people feel a good deal of soreness after working the soleus the first few times, but after that the soreness will go away and your mobility will begin to improve.
Day 3:
Duration: 8:00
Equipment: Lacrosse Ball
Up until now we’ve covered the larger, well-muscled section of the lower legs. Today, we’re going to spend time exploring the soles of our feet.
If you’re a runner or someone who regularly wears high heels, then you’ll find a great deal of benefit in this lesson. The video will go into detail, but the fact that most of us wear shoes all day is reason enough to be following this particular sequence religiously.
Day 4:
Duration: 8:00-10:00
Equipment: Lacrosse Ball
After the last video, you should have a much better feeling for what’s going on around the bottom of your feet. But there’s still a lot of territory we can cover with the foot.
The foot is composed of 26 bones and 33 joints. This leaves us a lot we can work on to improve the way our feet move and feel. So, today’s lesson walks you through a few techniques that will work the muscles and connective tissue on the top of the foot.
Day 5:
Duration: 8:00-10:00
Equipment: Lacrosse Ball/Foam Roller
The final phase of our journey into our anatomy focuses on working the front of the shin with a lacrosse ball or foam roller, as well as four different stretches for the feet and ankles. These exercises help to round out your tools for working on the lower half of your legs.

How to Use This Plan to Heal Calf Pain
After concluding this video series, you’ll have a thorough knowledge of the areas in your legs, feet, and ankles that are the most troublesome — as well as how to improve them.
You can use this series in two different ways:
- You can run through it, day by day, in the prescribed order and keep repeating it.
- You can select one or more parts of the series that feel most beneficial and use them to help improve the condition of your legs.
Neither approach is more correct than the other. What you do should come down to what you find to be the most helpful for your situation.
That said, I recommend only doing one video per day. Those who take on more than 8:00-10:00 of mobility work in a day eventually get burned out from the amount of work it proves to be. In my experience, a little bit of work over the long term is a continually proven formula for success.


