Ever look at those super-bendy Instagram yogis and think, nah, my body can't do that? Think again—these seven back flexibility-focused yoga poses will help you lengthen your body, ease tight muscles, and feel more limber.
Yes, You Can Be More Flexible!

Always wanted to do wheel pose with ease? Frustrated that forward bends are so difficult and don’t know why? (Hint: Every forward bend is a back bend in disguise!) Improving back flexibility is key. A more flexible spine reduces overall back pain, helps you sleep, and strengthens your posture.
These seven yoga poses will help you open your hips, open your shoulders, create more space in your body, and improve your overall back flexibility. (If your hips are particularly tight, try these yoga hip openers, too.)
Do the complete series at least three times a week, finishing with your favorite spinal twist when you are done.
Cat/Cow
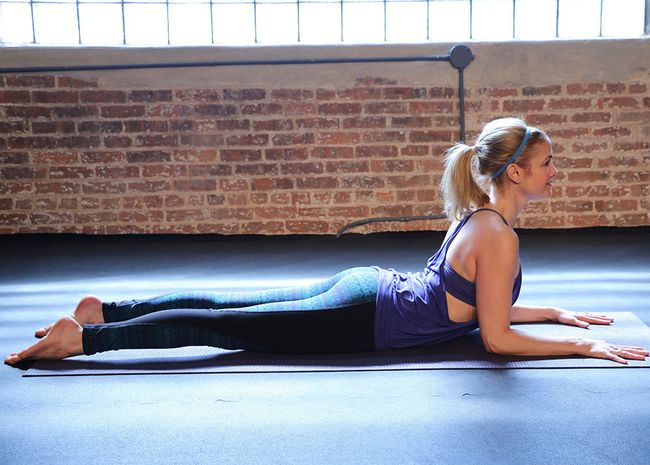
A. Lie on your stomach, place elbows underneath shoulders, forearms on the ground.
B. Pull chest forward as you press shoulders down and together while lengthening through your tailbone. Make sure all 10 toes are on the ground.
C. Breathe length between each vertebra from the tailbone to the crown of your head.
Stay for five deep breaths.
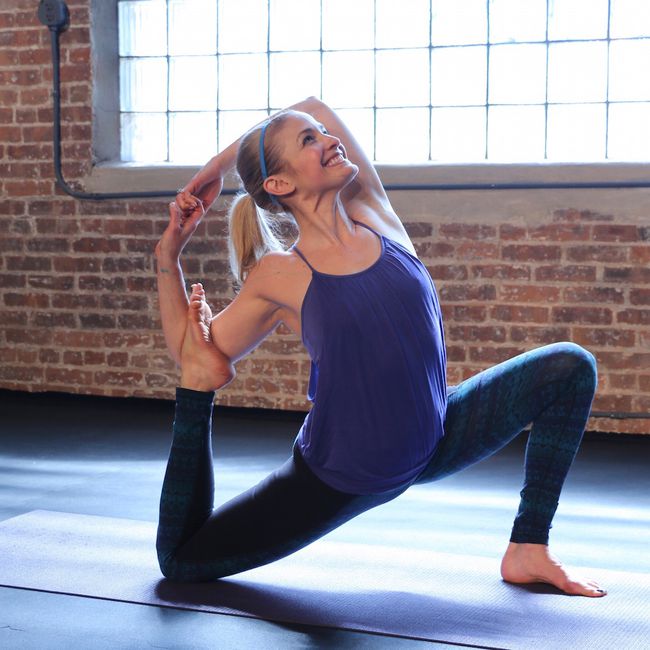
"Easy" King Pigeon Pose

A. Begin in a low lunge with the left foot forward and back knee on the floor.
B. Slowly crawl hands up onto the left thigh and breathe here for five deep breaths.
C. Bend the right knee, grab hold of the right foot and place it in the crook of the right elbow, then try to square hips to the front.
D. Bend the right elbow and reach the left hand back to clasp the right.
Stay here for at least five deep breaths, then repeat on the other side.
Make it easier: If you can't reach your foot, use a hand towel or yoga strap in between your hands to work on your back flexibility without injury yourself.
One-Legged King Pigeon Pose
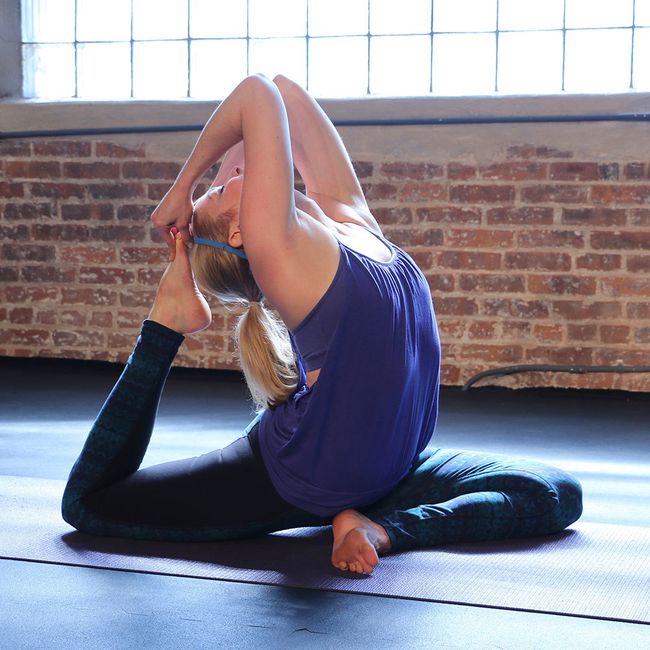
A. From down dog, sweep the left shin forward toward the front of the mat, but not as parallel to the front of the mat as you would in a forward-bending pigeon. Keep the right leg long outstretched behind, toes untucked.
B. Bend the right knee and place the foot in the crook of the right elbow. Reach left arm to the ceiling, bend elbow, and reach the right hand back to clasp your left. Breathe here.
C. Next, take a strap, loop it around the back foot with enough slack to face torso forward, bringing upper arms on either side of head with forearms parallel to the ceiling and hands holding the strap.
D. Slowly, start to crawl hands as close to the back foot as they want to get. Stay here, or when possible, take hold of the back foot with both hands and release the strap. (When coming out of the pose, do so very slowly.)
Breathe here at least five deep breaths. Repeat on the other side.
Half Frog Pose
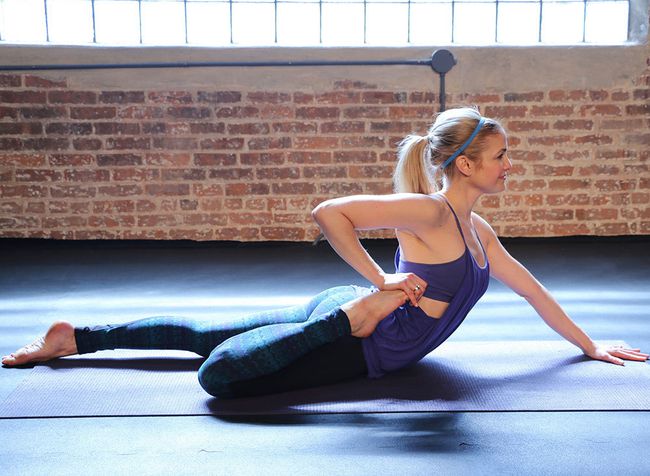
A. Begin lying facedown on a yoga mat.
B. Rise onto forearms with elbows directly underneath shoulders and breathe here in sphinx pose.
C. Keeping knees no wider than hip-width apart, bend the right knee and bring the right hand to the top of the right foot, fingers facing the same direction as the toes. (Position elbow to graze your rib cage rather than allowing it to wing out.)
D. Lift through your chest.
Breathe here for at least three deep breaths. Repeat on the other side.
Make it harder: If you're very comfortable with this variation and want to develop even more back flexibility, you can deepen the pose by lengthening the bottom arm (as pictured).
Bow Pose
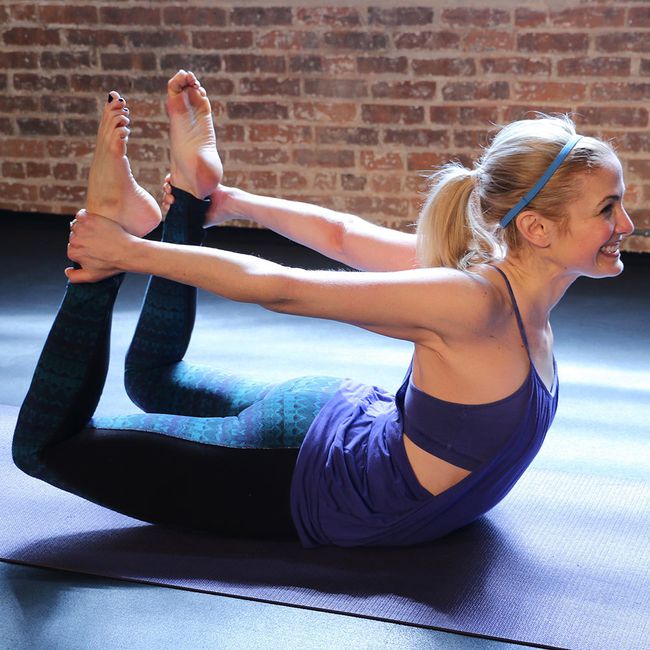
A. Lie facedown, bend knees, and grab ankles with hands.
B. Press feet away from head, ankles into hands, keeping knees hip-width apart, and lifting chest off the ground.
Stay here for at least five deep breaths.
Back flexibility yoga tip: Try grabbing both the inside and outside of your ankles for a different shoulder opening. (These other yoga poses are amazing shoulder openers as well.)
Supported Bridge with Hip Opener
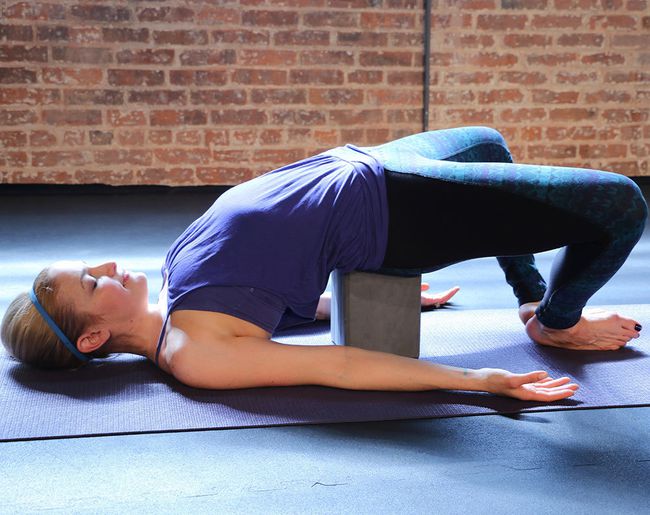
A. Start lying face-up on the mat. Bend knees, placing feet on the ground hip-width apart.
B. Lift hips and place a yoga block underneath at whatever setting feels best for the back, then lower sacrum onto the block.
C. Release your arms to either side of the body and, once steady, place the bottoms of feet together, allowing knees to fall apart. (To release, place feet back on the ground hip-width apart, come on to balls of feet, lift hips, remove the block, and gently release back onto the ground.)
Breathe here for at least 10 deep breaths.
Back flexibility yoga tip: Start this pose at the lowest height of the block and gradually work your way up to the block's highest height, if that feels OK for your back on any given day.


